How to make the table and insert values in SQLite DB - Android Studio
SQLite implementation project and fetch data into RecyclerView in Android Studio

Hello folks, in this article we will see how we can implement an SQLite database, make tables, insert data into tables, and fetch the table's data into RecyclerView using Kotlin.
In this article, we will make an app that will store the user data ( name, email ) in the SQLite Database and will show all the stored data inside RecyclerView
Step 1: First create a new Android Studio project
Create a new project in android studio (hashnode.dev)
Skip designing part
Step 2: activity_main.xml file designing part
activity_main.xml
<?xml version="1.0" encoding="utf-8"?>
<LinearLayout xmlns:android="http://schemas.android.com/apk/res/android"
    xmlns:app="http://schemas.android.com/apk/res-auto"
    xmlns:tools="http://schemas.android.com/tools"
    android:layout_width="match_parent"
    android:layout_height="match_parent"
    android:orientation="vertical"
    tools:context=".MainActivity">

    <LinearLayout
        android:layout_width="match_parent"
        android:layout_height="wrap_content"
        android:orientation="vertical">

        <LinearLayout
            android:layout_width="match_parent"
            android:layout_height="wrap_content"
            android:orientation="horizontal"
            android:padding="5dp">

            <TextView
                android:layout_width="wrap_content"
                android:layout_height="wrap_content"
                android:text="Name : "
                android:textColor="@color/black"
                android:textSize="20dp"
                android:textStyle="bold" />


            <EditText
                android:id="@+id/name"
                android:layout_width="match_parent"
                android:layout_height="wrap_content"
                android:hint="Enter name"
                android:textColor="@color/black" />


        </LinearLayout>

        <LinearLayout
            android:layout_width="match_parent"
            android:layout_height="wrap_content"
            android:orientation="horizontal"
            android:padding="5dp">

            <TextView
                android:layout_width="wrap_content"
                android:layout_height="wrap_content"
                android:text="Email : "
                android:textColor="@color/black"
                android:textSize="20dp"
                android:textStyle="bold" />


            <EditText
                android:id="@+id/email"
                android:layout_width="match_parent"
                android:layout_height="wrap_content"
                android:hint="Enter email address"
                android:textColor="@color/black" />


        </LinearLayout>

        <Button
            android:id="@+id/insert"
            android:layout_width="match_parent"
            android:layout_height="wrap_content"
            android:layout_margin="5dp"
            android:text="Insert"
            android:textSize="16dp" />

    </LinearLayout>

    <androidx.recyclerview.widget.RecyclerView
        android:id="@+id/recView"
        android:layout_width="match_parent"
        android:layout_margin="5dp"
        android:layout_height="match_parent"/>


</LinearLayout>
Screen design result :

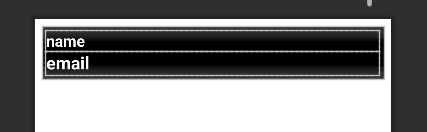
Step 3: Create a custom layout file for RecyclerView
custom_user.xml
<?xml version="1.0" encoding="utf-8"?>
<LinearLayout xmlns:android="http://schemas.android.com/apk/res/android"
    android:layout_width="match_parent"
    android:layout_height="wrap_content"
    android:layout_margin="8dp"
    android:padding="5dp"
    android:background="@color/black"
    android:orientation="vertical">

    <TextView
        android:id="@+id/name"
        android:layout_width="match_parent"
        android:layout_height="wrap_content"
        android:text="name"
        android:textColor="@color/white"
        android:textSize="18dp"
        android:textStyle="bold" />

    <TextView
        android:id="@+id/email"
        android:layout_width="match_parent"
        android:layout_height="wrap_content"
        android:text="email"
        android:textColor="@color/white"
        android:textSize="20dp"
        android:textStyle="bold" />

</LinearLayout>
Screen design result :
Step 4: Create DatabaseHelper.kt class to perform all the implementations and operations of DB
create DatabaseHelper.kt the class which will extend SQLiteOpenHelper class
package com.tworoot2.sqlitedatabase.databaseClass

import android.content.ContentValues
import android.content.Context
import android.database.Cursor
import android.database.sqlite.SQLiteDatabase
import android.database.sqlite.SQLiteOpenHelper

class DatabaseHelper(private val context: Context) : SQLiteOpenHelper(
    context, DATABASE_NAME, null,
    DATABASE_VERSION
) {

    // this function will create table inside our database
    override fun onCreate(sqLiteDatabase: SQLiteDatabase?) {
        sqLiteDatabase!!.execSQL("create Table UserDetails(ID INTEGER PRIMARY KEY AUTOINCREMENT,name TEXT, email TEXT)")
    }

    // Called when the database needs to be upgraded.
    // The implementation should use this method to drop tables, add tables,
    // or do anything else it needs to upgrade to the new schema version.
    override fun onUpgrade(sqLiteDatabase: SQLiteDatabase?, oldVersion: Int, newVersion: Int) {
        sqLiteDatabase!!.execSQL("DROP TABLE IF EXISTS UserDetails")

    }

    // function for inserting data into Database
    fun insertData(name: String, email: String): Boolean {

        // Gets the data repository in write mode
        val db: SQLiteDatabase = this.writableDatabase
        val contentValues = ContentValues()
        contentValues.put("name", name)
        contentValues.put("email", email)

        val result = db.insert("UserDetails", null, contentValues)

        return !result.equals(-1)
    }

    // function for fetching all the data from database
    fun getData(): Cursor? {
        val db = this.writableDatabase
        return db.rawQuery("Select * from UserDetails", null)
    }


    // initialize here database name and database version
    companion object {
        const val DATABASE_NAME = "MyDatabase.db"
        const val DATABASE_VERSION = 1
    }


}
Now our SQLite Database Helper class is ready, and we can insert the values in the Database
Step 5: Make data class and adapter class for recycler view
UserData.kt class
package com.tworoot2.sqlitedatabase.dataClasses

data class UserData(val name: String, val email: String)
UserAdapter.kt class
package com.tworoot2.sqlitedatabase.adapters

import android.content.Context
import android.view.LayoutInflater
import android.view.View
import android.view.ViewGroup
import android.widget.Button
import android.widget.TextView
import androidx.recyclerview.widget.RecyclerView
import com.tworoot2.sqlitedatabase.R
import com.tworoot2.sqlitedatabase.dataClasses.UserData

class UserAdapter(var context: Context, var arrayList: ArrayList<UserData>) :
    RecyclerView.Adapter<UserAdapter.UserViewHolder>() {


    override fun onCreateViewHolder(parent: ViewGroup, viewType: Int): UserViewHolder {
        val view = LayoutInflater.from(parent.context)
            .inflate(R.layout.custom_user, parent, false)

        return UserViewHolder(view)
    }

    override fun onBindViewHolder(holder: UserViewHolder, position: Int) {
        holder.name.text = arrayList[position].name
        holder.email.text = arrayList[position].email
    }

    override fun getItemCount(): Int {
        return arrayList.size
    }


    inner class UserViewHolder(itemView: View) : RecyclerView.ViewHolder(itemView) {
        val name: TextView = itemView.findViewById(R.id.name)
        val email: TextView = itemView.findViewById(R.id.email)

    }


}
Step 6: Now it's the turn of MainActivity.kt file
In MainActivity.kt file we will have two parts, first will be the data inserting part and the second will be the data retrieving part inside the recycler view
package com.tworoot2.sqlitedatabase

import android.database.Cursor
import androidx.appcompat.app.AppCompatActivity
import android.os.Bundle
import android.widget.Button
import android.widget.EditText
import android.widget.Toast
import androidx.recyclerview.widget.LinearLayoutManager
import androidx.recyclerview.widget.RecyclerView
import com.tworoot2.sqlitedatabase.adapters.UserAdapter
import com.tworoot2.sqlitedatabase.dataClasses.UserData
import com.tworoot2.sqlitedatabase.databaseClass.DatabaseHelper

class MainActivity : AppCompatActivity() {

    lateinit var name: EditText
    lateinit var email: EditText
    private lateinit var insert: Button
    lateinit var recView: RecyclerView
    private lateinit var databaseHelper: DatabaseHelper
    lateinit var adapter: UserAdapter
    lateinit var arrayList: ArrayList<UserData>

    override fun onCreate(savedInstanceState: Bundle?) {
        super.onCreate(savedInstanceState)
        setContentView(R.layout.activity_main)

        name = findViewById(R.id.name)
        email = findViewById(R.id.email)
        insert = findViewById(R.id.insert)
        recView = findViewById(R.id.recView)

        databaseHelper = DatabaseHelper(this)
        arrayList = ArrayList()

        addValuesInArrayList()

        // data retrieving part inside recyclerview
        recView.layoutManager =
            LinearLayoutManager(this@MainActivity, LinearLayoutManager.VERTICAL, false)
        adapter = UserAdapter(this@MainActivity, arrayList)
        recView.adapter = adapter


        // data inserting part
        insert.setOnClickListener {
            if (name.text.equals("") || name.text.isEmpty() ||
                email.text.isEmpty() || name.text == null ||
                email.text == null || email.text.equals("")
            ) {
                if (name.text.equals("") || name.text.isEmpty() ||
                    name.text == null
                )
                    name.error = "Please enter your name"
                else if (email.text.isEmpty() || email.text == null || email.text.equals("")) {
                    email.error = "Please enter your email"
                }
            } else {
                val inserted =
                    databaseHelper.insertData(name.text.toString(), email.text.toString())
                if (inserted) {
                    Toast.makeText(this@MainActivity, "Inserted successfully", Toast.LENGTH_SHORT)
                        .show()
                    arrayList.clear()
                    addValuesInArrayList()
                    adapter = UserAdapter(this@MainActivity, arrayList)
                    recView.adapter = adapter

                } else {
                    Toast.makeText(this@MainActivity, "Not inserted", Toast.LENGTH_SHORT).show()
                }
            }
        }


    }

    // this method will add all the data to arraylist from Database
    private fun addValuesInArrayList() {
        val cursor = databaseHelper.getData()
        while (cursor!!.moveToNext()) {
            arrayList.add(UserData(cursor.getString(1), cursor.getString(2)))
        }
    }
}
Video Output :
All required comments are available in every code section
That's all for this
Thank you for reading this article, if you found this helpful please subscribe.

